Showing posts with label Crafts. Show all posts

Tuesday, September 22

Spa Night

The YW love a good spa night - especially if they get to invite their Moms! Here are a few ideas from ours:

1) DEVOTIONAL - on what true beauty is.

2) NAIL STATION - mothers and daughters give one another manicures (hand scrub recipe: 1 cup coarse sea salt, 1/2 cup liquid coconut oil, 6 drops of essential oil for scent), including painting one another's nails.

3) MAKEUP STATION - We brought some inexpensive cosmetics (new for hygiene reasons) and disposable applicators and one of the leaders demonstrated on a YW the proper way to apply makeup and then mothers/daughters did makeovers.

4) CRAYOLA LIPSTICK CRAFT - Recipe: 1/2 teaspoon of coconut oil, 1 crayon (soak wrapper for a few minutes to easily peel off) broken into 3-4 pieces (or combine 1/2 each of 2 crayons) and 1/4 teaspoon vegetable oil (or essential oil if you want them scented) for gloss and easier spreadability). We put a frying pan on the stove with 1-2" water and brought to a simmer. Our frying pan held 4 ramekins so 4 YW could go at a time. YW prepared their ramekins with the oils/crayons and put them in the frying pan (in the ramekin so it's a makeshift double boiler). Stir with skewers (we had tiny plastic spoons that we used to measure the oils and to stir with). Then use pipettes to put hot lipsticks into lipstick containers. *We really only ended up purchasing pipettes and lipstick containers because we had everything else! There are many youtube videos on how to make the crayola lipsticks.

5) HAIR STATION - We downloaded several videos from Cute Girls Hairstyles and one of our YW manned a station where the YW and mothers could watch the videos and do one another's hair. Be sure to download the videos, because most churches block YouTube over the wifi (unless you're using a cell device, obviously).

6) REFRESHMENTS - We purchased nut cups and peanuts and chocolate covered fruit. We made little cups of nuts and little cups of the chocolate covered fruits and put little circle labels on them (see printable below). We also had little water bottles with labels (see printable below).


7) PRINTABLES - 

Water Bottle Labels - Here is a link to the label above PDF here or WORD document here if you prefer. These labels are 1.25" x 8." We used Kirkland brand water bottles from Costco (the SMALL 8 oz bottles) and removed the labels from them (don't remove the sticky glue from the bottles when removing labels!). The new labels were stuck to the old glue and then wrapped around and glued with a simple glue stick (you could use any glue but a glue stick totally worked!!). 

Round Stickers for nut cups or napkins or whatever - Here is a link to the PDF and here is the link to the Word document. (We used Avery 8293 round labels - which we had lying around)

*Font: The font is Cutie Pop and you can download it for FREE here.

Feel free to edit, change, whatever to your heart's content!

Thursday, August 8

Pumpkin Craft


Super cute and simple craft for the YW to do. They can make these for their own homes or as a service to deliver to ladies in the ward or even as a fund raiser! This is really only cost effective if you get the canning bands donated or find a super deal on them at a thrift store, etc.

I found this idea HERE. To make these pumpkins, you simply paint the canning bands, string them together and add cinnamon sticks in the middle.

*You can get 3lb of cinnamon sticks on Amazon relatively inexpensively. Click HERE to see/purchase.

*Here's a GREAT color of spray paint from Amazon as well. You can do quite a few pumpkins with one can!

Wednesday, August 31

General Conference Value Project - It's that time of year again!


General Conference is coming before we know it and so I thought I'd remind us all about this awesome Value Project. It would be a good time to remind the YW to finish up their Value Experiences in Knowledge so they can work on this Project. Also, I just found this adorable craft that would go along great with this project.

Saturday, June 18

Totem Pole

Our camp theme this year is S.A.F.A.R.I. (Stand as faithful and righteous individuals) and we are doing a lot of jungle "stuff" for camp. One thing we are doing is this awesome totem pole idea from Family Fun Magazine. Instead of coffee cans, we used #10 cans.

We had sisters in the ward save and donate the cans and then purchased extra lids (you need two plastic lids for each can) from the cannery (.10/ea). We soaked off the labels in the tub and scraped off glue with a dish scraper.

For paint, we went to a local hardware store and purchased the sample size of a bunch of colors (we did red, yellow, blue, purple, orange, green, brown, black and white). The YW each decorated their own cans. The exterior paint really only needs one coat and dries quickly. You may want to take a blow dryer or two to speed up drying between layered coats (like for eyes, etc.).

I found a website that had more traditional totem pole designs and copied and pasted a bunch of designs into Word so I could print them out for the YW to look at and design their cans. Encourage the YW to draw out their designs on paper before committing them to their can! Their designs can be more traditional or more modern (as in the illustration from Family Fun).

To put our totem pole up at camp next week we will be using a fence post driver (borrowed from someone in the ward) to put in a fence post (borrowed from someone in the ward - we borrowed enough fence posts to hold up our totem pole and our trees!). The fence post will hold up our pole (we purchased inexpensive pvc and our pole will be about 15' tall when finished!). I will take a picture of our final totem pole and upload it when I get back!

Tuesday, June 7

Candy Vase

Here's an idea for a thank you gift or as a craft to take as a service to people in the Ward who may need a pick-me-up. Simply purchase some glass vases and fill them with the candy of your choice (Skittles, Jolly Ranchers, M&Ms, whatever!) and add some silk flowers. There are many different looks you can achieve.

Another idea is to get a soup can and use double-sided tape or hot glue to attach candy sticks around the can and then put live flowers inside. You can do this with candy canes for a festive Christmas look or just use regular candy sticks.

Thursday, May 26

It's All In The Cards


Since scrapbooking and card making are so popular these days, have some of the experts in your ward come teach the girls how to make cards. The girls love crafty things, and cards are fun to make!

Here are a few links to some card making sites:

Homemade Pop-up Cards
Paper Bag Greeting Cards
Sunflower Thank You Card
Pop-up Flower Garden Card
3-D Card (Video)

-------------------------------------------------------

Fabulous Folds for Card Making

Tuesday, May 3

Clock Craft

So I recently joined my sister in creating a Sharing Station for BYU Women's Conference (the link will work once our booth is posted). It was quite the project! The theme was "How do you spell love? T*I*M*E" from President Uchtdorf's talk in October Conference, 2010.

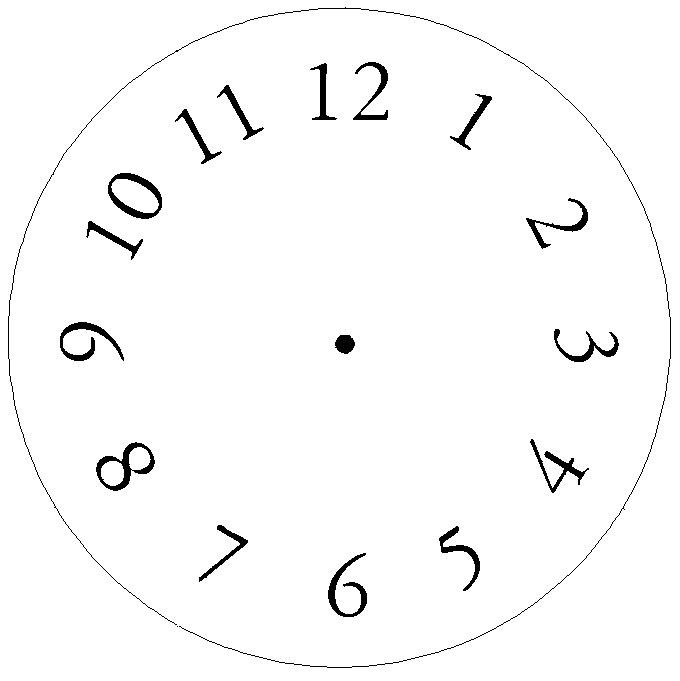
Because our theme was about TIME, one of our objects for our table was a clock. I really wanted a "Families are Forever" clock, but I also wanted it to match the color scheme of our booth. SO, I decided to make my own clock face.

This would be a simple project to do with the YW and they could put the yearly theme - or a favorite scripture - or whatever they want on the face of their clock. HERE is the .jpg for the one I made for the booth. HERE is one with this year's theme. Feel free to use either or to make your own template! Here are a couple of blank templates: | TEMPLATE 1 | TEMPLATE 2 |  You can download them and add your own graphics, words, etc.*

I found instructions HERE and followed them almost completely. Before you do this, I highly recommend their advice of purchasing a clock with a PLASTIC face (I am speaking from broken glass experience on this one). The project is fairly straight forward. You remove the plastic cover with a butter knife, turn the hands to 12 and carefully slide them off, insert your new clock face (gluing if necessary), put everything back together and voila!

* Photoshop hint: If you want to do the letters around in a circle in Photoshop simply create a circle path and then select your horizontal text tool and type onto the path - it will follow the circle!

Friday, April 29

Sew What


I'm a big believer in teaching the girls practical homemaking skills in a fun way. Sewing is one of those arts that is fast disappearing. Let the girls pick from some simple projects: tote bag, apron, shorts, pajama pants, simple skirt, stuffed animals, quilt blocks for a humanitarian quilt, etc. Some church buildings have sewing machines in the R.S. room, but you can ask ladies in the ward who sew if they would come and bring their machines and help teach the girls.It was fun seeing the girls enjoy sewing and making something that was fun and useful.

Another night could be about hand sewing and how to mend, sew on buttons, cross-stitch, and simple craft sewing (like felt Christmas ornaments).

Wednesday, April 27

Pin S.W.A.P. - Girls Camp Getting-to-Know-You Activity

I guess Girl Scouts have been doing this for years, but until last year I'd never heard of it. My camp director told me about it last year and we hosted our very first pin swap.

What is a pin s.w.a.p.?

Our ward hosted it last year and we're hosting it again this year. That means we call around and find out which wards are participating and get a head count. Once we know how many people are participating, we can begin making the pins.

Each ward makes an inexpensive pin (we budget $5-$10 total for all the pins our ward makes) for each YW (including their own ward) participating. At camp the girls will be given a pin for themselves and several pins to exchange with other YW in other wards. Then, when they meet a YW who is wearing a pin they don’t have, they can exchange for one of their ward pins. The goal is to get to know other YW and to collect pins from each participating ward.

How do I make the pins?

You can purchase flat-back pins and glue anything onto it – or you can use safety pins without the end stopper (as pictured above) or you can also purchase a tie-tac type of pin.

Last year our theme was The Little Mermaid and we glued tiny pink seashells onto flat-back pins. They were so pretty and inexpensive. The YW had a great time exchanging with other wards. Our YW wore their pins on their hat bands. This year we're making them neckties in zebra stripes (we're zebras for our safari theme) that they can put their pins on. We haven't decided on the pins themselves yet. Any ideas? Leave them in the comments!

You can find out more information and get ideas by googling camp pin S.W.A.P. (Special Whatchamacallits Affectionally Pinned).

Certification Requirement!

The 4th years have as one of their certification requirements: "Help to plan an activity for the whole camp or you own group that will help the campers get to know each other. Involve everyone." They made the pins and passed this off!

Tuesday, April 26

Need to Make a Tree??

Our camp theme this year is a safari theme and I decided that in order for us to really have that jungle feel we really needed TREES. Jungle trees! I found these amazing trees and knew they were the ones for me. Awesome looking and CHEAP and simple to make.


What you need:
What you do:
  • Cut the bottoms out of the paper bags and scrunch them (one after the other) onto the trunks, stapling to hold them on good.
  • Design and cut out palm-style leaves from the green vinyl.
  • Tape the end of each leaf onto the top center (button thingy) of the umbrella - covering the entire umbrella with leaves.
  • Staple the leaves onto the fabric of the umbrella - not necessarily flat (the tutorial above says "pooch" them) - I think we're going to tape ours so we can re-use the umbrellas. That way I can just bring some from home!
  • Place the umbrellas in the tops of the trees - VOILA!
I think we'll hang our lanterns from the trees - should look awesome!! We'll put a few tiki torches around and we're also going to make a totem pole by simply painting a couple of the carpet rolls. I'll post that project when we get there.

The trees in the photo were held up using microphone stands. We're going to put them up around our camp over metal fence posts that we will put into the ground to hold them in place. I can't wait!!

Thursday, April 21

Embroidery Hoop Baskets

We made these adorable baskets. They are super simple to make and they take about the right amount of time for the length of one mutual activity night.


We purchased some $1 t-shirts from a local thrift store, but you could have the YW bring old t-shirts for a recycle project and then they would be free!

All you need to make this craft are old t-shirts (clean, of course), scissors, tacky glue (we actually made ours without doing the glue step and they worked fine) and 12" embroidery hoops.

Wednesday, April 20

Lantern for Girls Camp


We made these awesome lanterns last year for Girls Camp. We decided to make them again this year. We emailed our Relief Society group and asked for jar donations. We explained that we like them without the embossing - mayo jars and spaghetti sauce jars work well! We received all of the jars that we needed for our project. We had the YW clean them well and we used a Cricut® - actually, we used two - to cut shapes out of contact paper. This year's theme is S.A.F.A.R.I. and so most YW chose to do jungle animals, etc. Some YW chose to free-hand their ideas on the contact paper (they're so creative!) and cut them out with scissors.

Then we sprayed the jars with glass frosting (from a craft store) and crafted wire handles for them. We will put tea lights in each of them and I know they will look amazing. They did last year hanging from our canopy!

You can see all of the instructions for making these jars @ Under My Umbrella (the blog where I got the idea originally)!

-------------------------------------------------------------------

Everlasting Tealights Battery-Operated Flamess Candles with Soft Flicker, 12-Pack